Console makes it easy to quickly navigate through lots of records, enter case notes, reconcile donations, and more. Console users can move more efficiently through Salesforce than is really possible in the standard interface. This means that console can turn your users into superstars at Salesforce and superstars at their jobs!
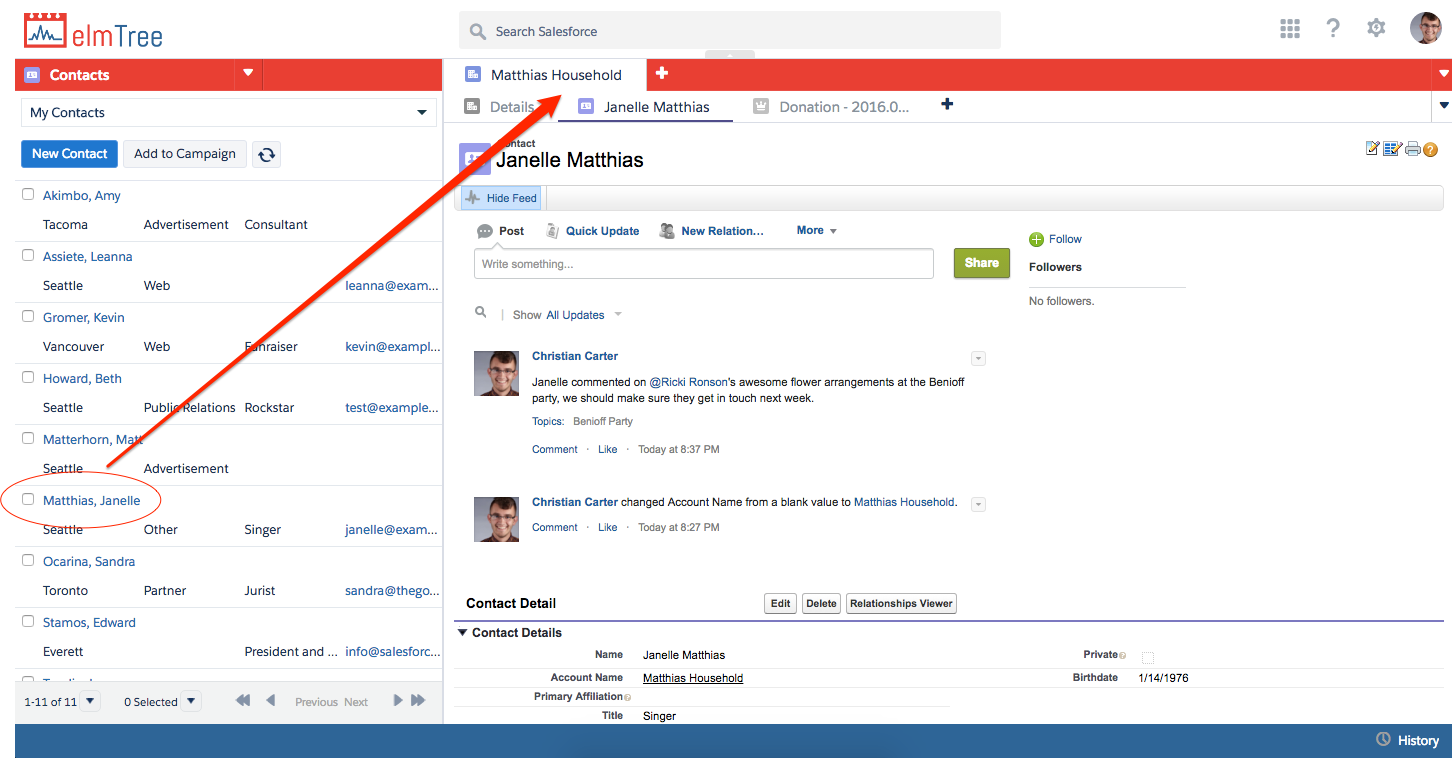
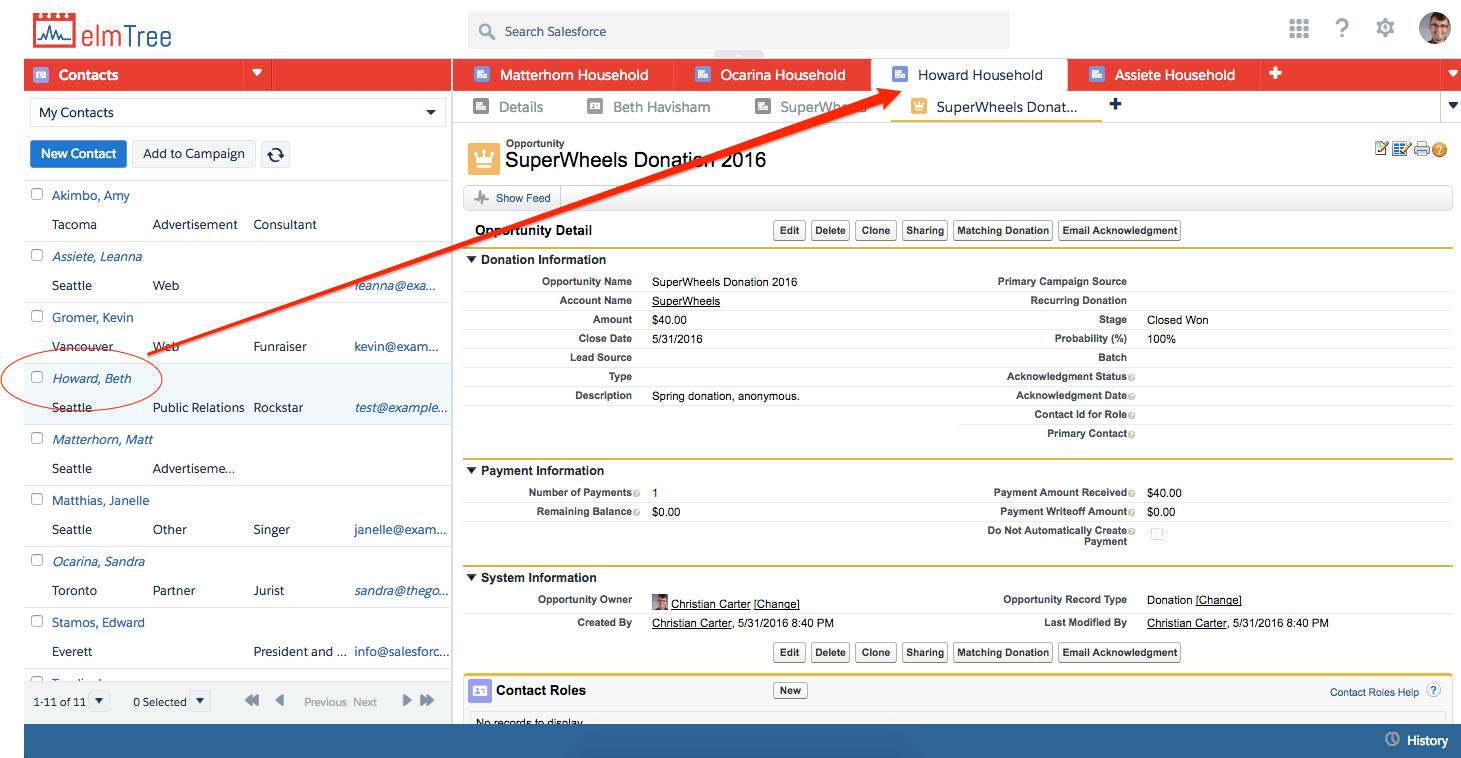
In console, records can open as primary tabs, or as sub-tabs of a main record This means we can open a Household as a primary tab, and underneath it we can open several donations. You can have multiple sets of sub-tabs open, console will notify you if you have unsaved work on a tab, and it has really nice keyboard shortcuts. Oh yea, and the whole interface is based on dynamically updating list views! I love list views, and console makes them the star of the show.
The Salesforce console is available to all Lightning Enterprise Edition license holders. Console is not available to the Salesforce Platform/App Cloud license types. Console does not require activating the Lightning Experience UI.
Here’s a quick (two minutes!) video from Salesforce about how to navigate Console, pointing out all the things that makes it special.
You might think to yourself that console looks a lot like Lightning Experience. You’re kind of right. You might have to squint a bit, but those are traditional Salesforce Classic (or “Aloha”) page layouts, and the good old Chatter publisher. Console uses the Lightning styling for it’s shell and the list views, and it DOES use the beautiful Lightning Design System icons, but you still get fully featured Aloha page layouts with as many button hacks as you need.
But the coolest thing about Console? It only takes about five minutes to set up and try it out.
How to Enable Console for a User
First things first, we need to create a permission set and assign it to our users:
Go to Setup>Manage Users>Permissions Sets and click the New button
Set the Label to “Console Access” and User License to “—None—”
Press Save
Under “App Permissions” -> “Sales”, click Edit then check “Sales Console” and Save.
Now we’ll assign our user the Sales Console Permission Set License.
Navigate to your User in Setup and click on your name.
Under Permission Set License Assignments (NOT Permission Set Assignments) edit assignments, and check the box to assign the “Sales Console User” License.
You have to do this for every user, one at a time.
Finally assign the Permission Set you created earlier to all your users.
Console is now accessible to those users, and there is even a starter “Sample Console” that you can make visible for user’s profile if you’d like. In your Salesforce instance, you can use this Salesforce walk through to customize the “Sample Console.”
How to Configure Console in your Org
Consoles are configured in Salesforce as a type of Custom App. Once you build one, your users can just select it from the blue app menu in the upper right, like anything else. This also means you can give your console a special name and logo. Maybe you want to give your console roll out a code name to excite your users!
Here’s how to create and configure a console:
In setup, Create -> App -> New -> Console app -> and name your console. We’re going to create a NPSP Console today.
Set your logo if you have one. If you don’t have a good logo, use logomakr.com. That’s how I built the logo for this example console!
Select your tabs. A useful set for the NPSP is Accounts, Contacts, Opportunities, NPSP Data Imports, and Campaigns
You’ll want Account, Data Import, and Campaign set as Primary Tabs. Contact and Opportunity should be set to display as sub-tabs of Account [it will display as “Account Name (Account)”
Make it available to the appropriate profiles and hit Save!
If you want a bit deeper of a dive into how you setup and configure a Salesforce Console, check out this two minute video from Salesforce and do the Configuring a Salesforce Console Trailhead module.
Revel in the Glory of Your Work
Switch to the console app in your app menu (in the top right corner of your Salesforce page) and try it out!
What’s Next?
Building a custom console app is just the first step to successfully rolling console out into your org. Though this is a good start, the console interface is just different than normal Salesforce, and that means that your design considerations are different too.
You can stay all declarative, but make sure to optimize your page layouts for console use, setup highlight panels & feed layouts, build console friendly button hacks, and of course, design really useful list views so that your users can get things done.